The next video explains how to create an ear topology to add to the head model. The reference planes used in the head model were reopened in Photoshop and the ear section was modified. Similarly to the face reference planes, the ear was split up into blue and red lines which signify all of the polygons that make up the ear and where there are peaks and troughs to define the ear shape:
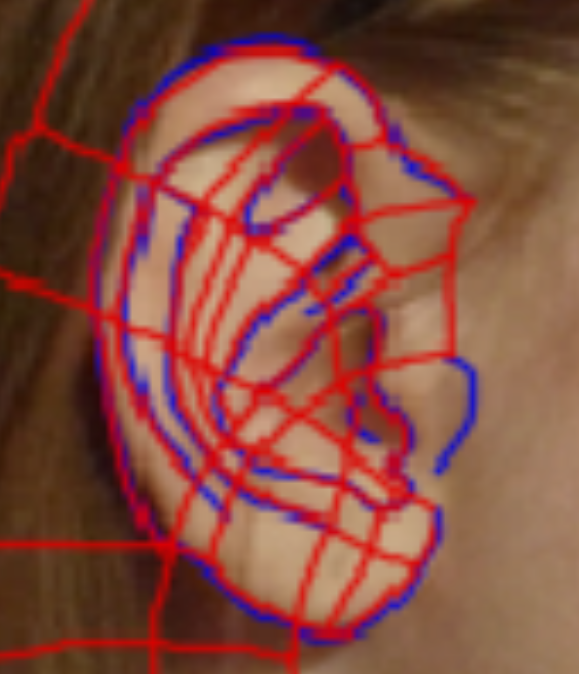
After importing the new reference plates, the outline was traced using the line tool. If any of the lines were either too close together or did not fit in with the rest of the face topology, it was very easily corrected by realigning some of the lines and adding in a few extra quadrants. The image below shows the finished topology:

One of the lines was selected and converted to an editable poly and then the attach tool was used to attach the rest of the lines to convert them to editable polys as well. As you can see from the image below, all of the segments are four sided which will make it easier to model and define.

The next image shows the beginning of the extrusion of the vertices. I started off with the outer edges first and gradually got closer and closer to the middle. The vertices were arranged according to where the troughs and peaks were so that it looked more like my own ear.

The image below shows my finished ear with a TurboSmooth modifier on it. I was very pleased with how it turned out because I felt it replicated my ear well.

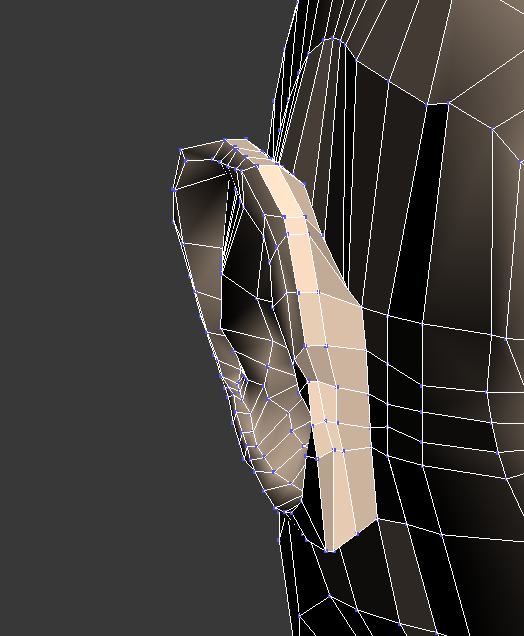
The next step was to extend the polygons and fold them back so that they could connect to the head. I found this part particularly difficult because I had a lot more polygons on the ear that I did on the side of my head, so it was very difficult to match them up exactly. The image below demonstrates how the polygons were folded back:

The image below shows the final result once the ear has been attached to the head before smoothing:
This is my head at the end of this stage without the TurboSmooth modifier on:

The image below shows my head model at the end of this stage with the TurboSmooth modifier on. I was not very happy initially because there was a lot of pinching, particularly where additional polygons had to be added to the head in order to connect the vertices properly. However, I managed to smooth out the majority. This may not necessarily be a complete disaster though because the head model will look better once the UVW Mapping has been completed and, if there is enough time, hair has been added to the model which will hide the majority of the mistakes.

No comments:
Post a Comment