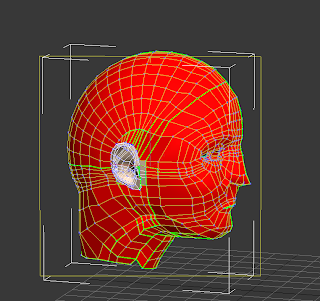
The next stage of the modeling process involves adding a bump texture onto the model to make it look more like me. However, before I could do this, I had to ensure that I mapped the UV co-ordinates correctly. I had to select the faces that I wanted to be impacted and then I applied a cylindrical map and modified it so that the head fitted inside perfectly.

The image below shows the UV co-ordinates and how the material would be distributed around the head. The idea is to have as many regular squares as possible. As you can see, there are a couple of problem areas that need rectifying, namely the top of the head and the neck.
The image below shows the UV map in it's current unchangd state:
Once placed into vertex mode, the vertices can be repositioned in order to correct the problem areas:
Once the top of the head and the neck had been sorted, it was time to move onto other areas of the face where there could potentially be some issues; the eyes and the nose. The image below shows a much improved mapping across the top of the head:
Onto the eyelids first, as you can see, there are a lot of overlapping faces which would cause havoc when trying to position a mesh.
After using the relax tool which relaxes all of the vertices so that they have the minimal number of crossings and overlappings, there are still many vertices which are still very close together and could cause a pinching effect.
After moving all the vertices out so that they are not so close together, this is the finished result:
The next problem area is the nostrils. There are many overlaps here which need addressing:
Again, using the relax tool seperates the vertices from each other, so that there are no more crossings or overlaps. However, simialrly to the eyes, the vertices have been positioned too closely together.
So using the move tool, I spaced them out manually. This will give a much better and smoother effect once the material has been added.
The image below shows the flattened face and head UV co-ordinates mesh.


No comments:
Post a Comment